cake stands

cake stand

cake stands come in different sizes, tiers, materials, and finishes.  though their original intention is to be serveware but they also make great home decor/organization pieces.

home decor:

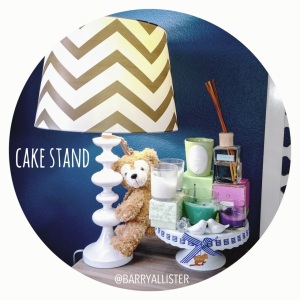
  • single-tier-  great for candle display.  stack candles on gift boxes, incorporate diffusers and other small decorating items for a great bed stand display (see featured image).
  • multi-tier- perfect for small accessories (e.g. rings, watches, earrings, hair clips, etc.) display/storage.

serveware:

  • single-tier- most versatile, suitable for serving whole cakes and pies.  if purchased in different sizes the stands can be stacked to make multi-tiered for small pastries display.
  • multi-tier- not suitable for large cakes and pies but great for small pastries display (e.g. croissants, cupcakes, cookies, tarts, etc.).  tiers can be utilized for small sauce dishes for jam, butter, cream to pair with pastries.

some of my cake stand favorites:

good cake stands are worth the investment for display during parties, bridal showers, baby showers… just to name a few.  happy serving, decorating, and organizing :)
diaper cake deco

diaper cake 2

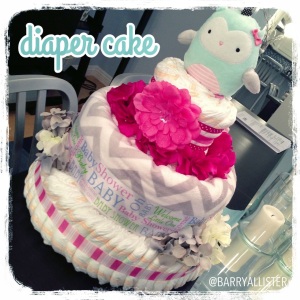
you’ve seen how to make a diaper cake here, my sister recently made a 3-layer diaper cake for her coworker’s baby shower and here are other options for decoration:

  • silk flowers- trim stems short and insert into edges where the cake layers meet
  • headbands- great rubber band substitute if it’s a cake for a baby girl (see top layer).  make sure the bands are not stretched to prevent deformation
  • stuffed toys- make great cake toppers if they’re small enough
  • blankets- roll, rubber band, they make great cake layers as well
  • other small baby items- shoes, socks, rattles, pacifiers, you name it.  to secure, stuff the tags into diaper gaps, best to sit on layers for a neater look, option to hang items off the sides

again, make sure no diapers were harmed during the making of the cake.  happy decorating :)

diaper cake

diaper cake

need to attend a baby shower?  diaper cakes are perfect for baby showers and contain the most essential item parents need for their newborn, diaper$ (yes, diapers are di$posable & expen$ivo)!  you can easily gift a box of diapers and other baby essentials with a diaper cake.  they make perfect centerpieces and won’t go to the baby mama’s waistline ;).

supplies:

for cake

  • newborn diapers (for value, i suggest these)
  • giant rubber bands, one or two for each cake layer

for decoration

  • baby items (toys, blanket, shoes, socks, accessories, silk flowers, etc.)
  • ribbons
  • glue gun
  • 4 wooden skewers
  • double sided tape
  • optional: cake stand for display

instructions:

for cake

  1. cake layers- start by spiraling the diapers and overlapping the diapers in a circular pattern like this
  2. once you’ve achieved the desired size for the cake layer, rubber band the perimeter of the cake
  3. if the layer is not dense or large enough, continue to insert more diapers into the layer
  4. continue steps 1-3 for each stacking layers.  each stacking layer should be about 2-3 inches smaller in circumference than the previous layer to create room for decorations
  5. stack each cake layers on top of each other until desire position
  6. insert wooden skewers from the gaps of the top layer down to the bottom layer so all layers are connected and secured (note: make sure not to poke through diapers)
  7. push  skewers down until they are no longer visible

options for cake

  1. incorporate a blanket into a layer or wrap blanket around diapers for a layer like this
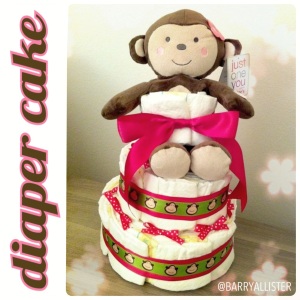
  2. incorporate stuffed animal into a layer if the stuffed animal is too big to be a cake topper like i did with the stuffed monkey (the diapers were secured around the monkey)

for decoration

  1. to hide the rubber bands around the perimeter of each layer, measure out ribbons around perimeter. hot glue overlapping edges (note: make sure you don’t hot glue the diapers!)
  2. make bows with ribbons and tape them on each cake layer with double sided tapes

make sure no diapers were harmed during the making of the cake.  happy no-baking :)

propulsion chandelier

photo

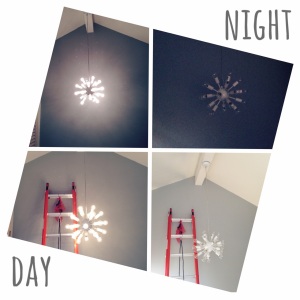
story behind my propulsion chandelier:

  • my condo has a vaulted ceiling staircase leading up to the bedrooms
  • i’ve had a custom electrical outlet wired for a chandelier for the longest time
  • finally found the perfect beauty on one kings lane for installation

so there, i now have a 24-light modern-snowflake- sputnik-looking propulsion chandelier hanging from my ceiling floating against the newly painted gray walls.

the light measures 16.5″ x 16.5″, it’s definitely large enough and bright enough to light up any staircase, living room, or dining room.

some of my sputnik-inspired favorites:

button shadow boxes

1379396_10102706782507976_544214409_n

supplies:

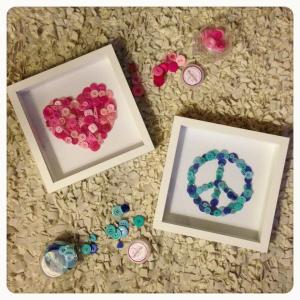
  • assorted buttons in pink and blue
  • hot glue gun
  • glue sticks
  • ikea ribba shadow box frames in white
  • scrapbooking paper for background

steps:

  1. cut the scrapbooking paper to fit the size of frame
  2. use a pencil and lightly draw or trace the shape desired (i did heart and peace)
  3. arrange buttons along the pencil marking
  4. individually glue each button with the hot glue gun
  5. continue to glue buttons until all white spaces have been filled (for the heart and peace sign i did double layer of buttons throughout the shape)
  6. reserve smaller buttons buttons to fill empty spaces and create more depth and texture